Optus DNS issue
A guide to manually setting your DNS for current parents and staff

Optus DNS issue
A number of users who are on the Optus network (mobile or home internet) have experienced issues with the single sign-on of our services.
If you are having difficulties accessing the BGS app, Schoolbox, Synportal or any functionality of our school systems and are an Optus customer, please follow the instructions below.
As a potential solution, we recommend manually changing the DNS settings on your personal devices.
Please note, we are unable to provide support for personal devices or any potential data loss resulting from these changes. We advise you to conduct your own research and assess the potential impact before proceeding with adjusting the DNS settings on your device.
The instructions below are to change your DNS settings manually. In most cases the DNS settings of your devices have been set to automatic, and should be able to revert to your old settings by changing your DNS settings back to automatic.
Optus mobile customers
Step 1
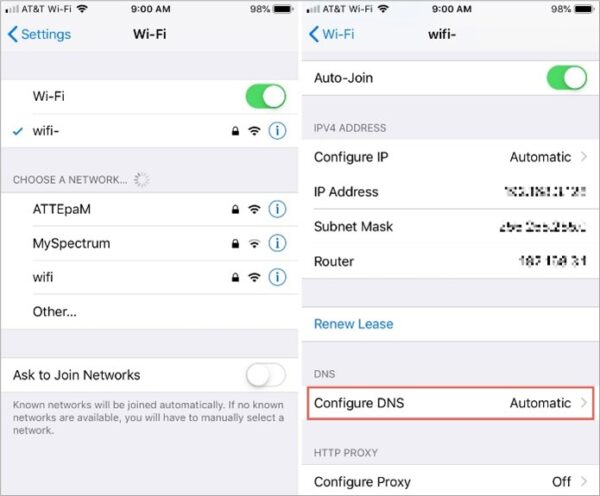
Go to Settings > Wi-Fi.
Step 2
Select the ⓘ icon next to the Wi-Fi network that you want to change DNS servers for.
Scroll down to find the DNS section and select Configure DNS.
Tip: Take a screenshot of the existing DNS addresses for future use.
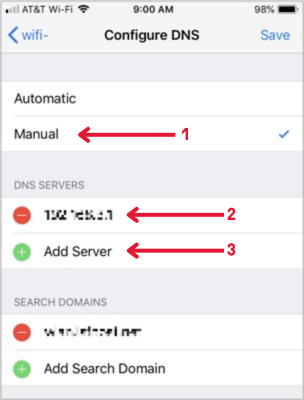
Step 3
- Select Manual
- Under DNS server, remove the current DNS by selecting the minus symbol
- Select Add Server by selecting the plus symbol
- Input: 8.8.8.8
- Select Save
Refresh / reload your internet browser app and you will be able to access your BGS services.
Step 1
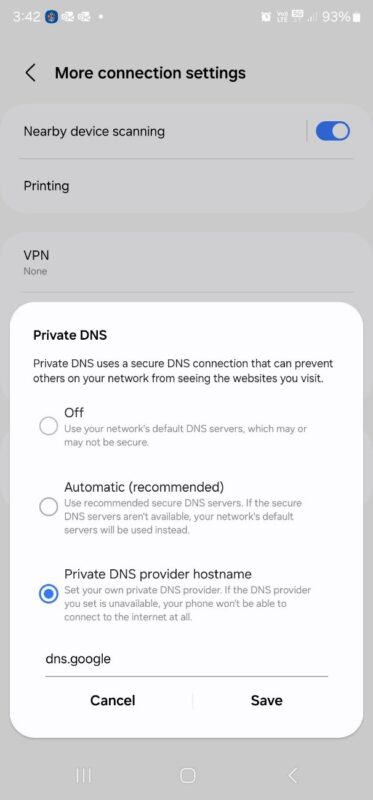
Go to Settings > Connections > More connection settings.
Step 2
Select Private DNS > Select Private DNS provider hostname.
Step 3
Enter dns.google as the hostname of the DNS provider and click select Save.
Refresh / reload your internet browser app and you will be able to access your BGS services.
Optus home internet /broadband/NBN customers
Step 1
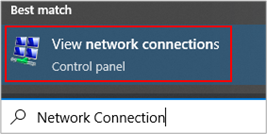
In the search field on your desktop, search for ‘Network Connections’. Then select ‘View network connections’.
Step 2
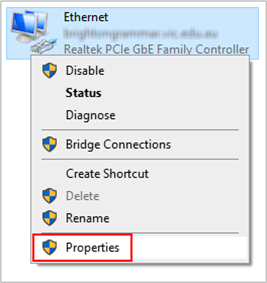
Right-click your active network connection (either Wi-Fi or Ethernet) and select Properties.
Step 3
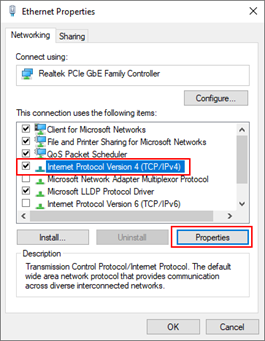
Select Internet Protocol Version 4 (TCP/IPv4) and click on Properties.
Step 4
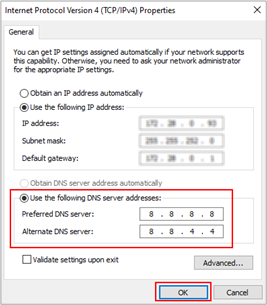
Select the option ‘Use the following DNS server addresses’.
For Preferred DNS server, enter: 8.8.8.8.
For Alternate DNS server, enter: 8.8.4.4.
Select OK.
Refresh / reload your internet browser and you will be able to access your BGS services.
Step 1
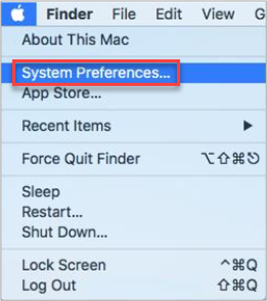
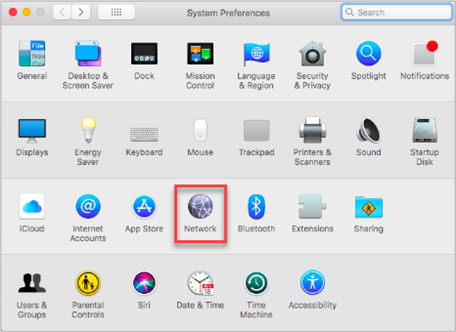
Open the ‘Apple menu’ and Select the ‘System Preferences’ option from the menu.
Step 2
Click on the ‘Network’ sub-option. If you encounter a locked padlock icon in the left corner, click it to alter settings. Enter your password if prompted.
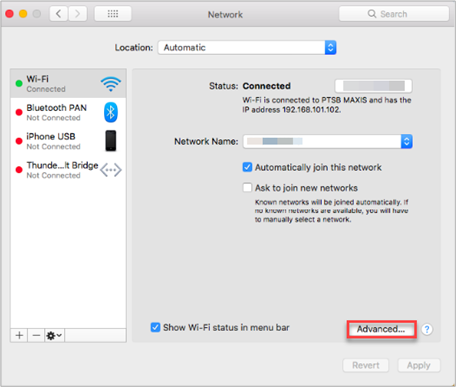
Step 3
Select the connection you wish to adjust and click ‘Advanced’.
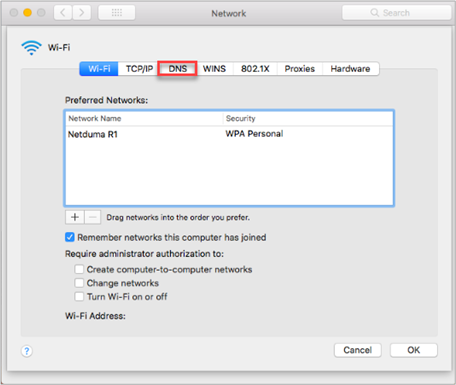
Step 4
Access the ‘DNS’ tab.
Step 5
To add new DNS server addresses or replace existing ones, click the plus (‘+’) icon.
Input the following DNS server addresses:
IPv4: 8.8.8.8 and/or 8.8.4.4
IPv6: 2001:4860:4860::8888 and/or 2001:4860:4860::8844.
Click ‘OK’ and then ‘Apply’.
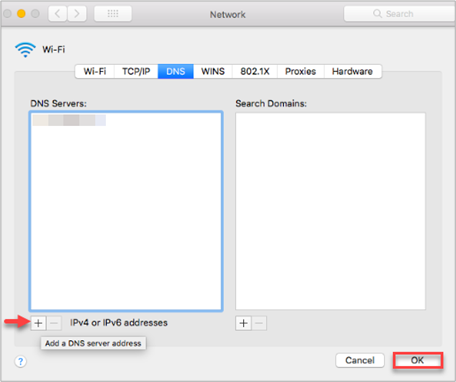
Refresh / reload your internet browser and you will be able to access your BGS services.
Do you need help or still have an issue?
For additional support, please log your query with Parent Assist.